


Volver al curso: Setup and Basic Workflow
Configuración de la máquina
En esta lección veremos cómo activar y configurar los parámetros de la máquina.
En primer lugar, activaremos las máquinas necesarias haciendo clic en el botón fábrica y seleccionando editar y luego máquinas. Aparecerá una lista de máquinas disponibles en la que podrá hacer clic para activarlas en su flujo de trabajo.
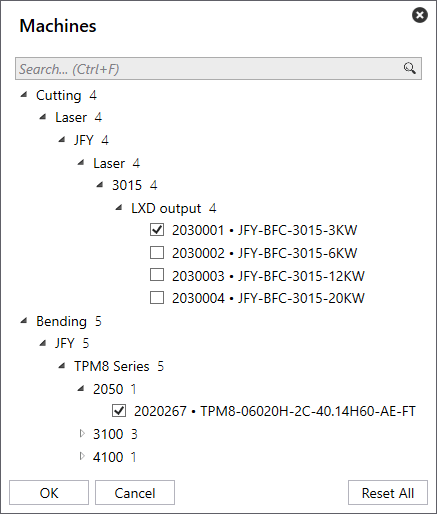
Una vez seleccionadas las máquinas puede pulsar ok para cerrar el cuadro de selección de máquinas y verá un mensaje de confirmación en la parte inferior izquierda de la pantalla de que la configuración está actualizada
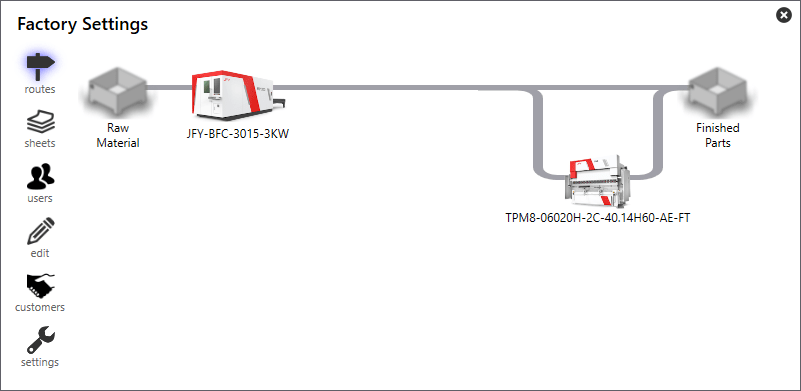
Una vez actualizada la configuración, puede hacer clic con el botón izquierdo del ratón en una máquina en la vista de flujo de trabajo, donde podrá ver y verificar cualquier parámetro de la máquina.
Nota: El software tiene diferentes formas de configurar las salidas y, en este ejemplo, también mostraremos la forma recomendada.
Opciones de configuración general
- Nombre que es un nombre descriptivo de la máquina
- NC Extension es el nombre de la extensión del archivo de código
- Habilitado es la máquina disponible o no.
- X-Max es el alcance máximo de trabajo de una máquina en el eje X
- Y-Max es el alcance máximo de trabajo de una máquina en el eje Y
- El grosor es el grosor máximo que puede procesar la máquina.
Nota: Las piezas que se importen se suprimirán automáticamente si no entran dentro de los parámetros de la máquina.
Opciones de envío de código
- Código Remitente este debe ser el remitente del informe
- NC Destino es la ubicación por defecto en la que se guardará el código.
- Destino del informe es la ubicación predeterminada en la que se guardará el informe.
- Destino CSV es la ubicación por defecto en la que se guardará cualquier exportación de datos CSV.
Nota: Diferentes máquinas y tecnologías pueden mostrar parámetros adicionales.